Compensation localization extension for the Czech version
The Compensation extension helps offset receivables and payables. Compensations are used when a customer is also a vendor. You can manually enter the entries to count on the Compensation Card page. In addition, there are functions to mark the entries to count and recalculate the balance.
There's also a print-out of the Agreement on Mutual Settlement of Receivables and Payables under Czech legislation.
Key features
- View Balance as Vendor/Balance as Customer – To view the balance as vendor on a customer card and the balance as customer on a vendor card, you must set a customer and vendor business relation with a contact to indicate that even though particular company is registered as a vendor and as a customer, it's in fact the same company.
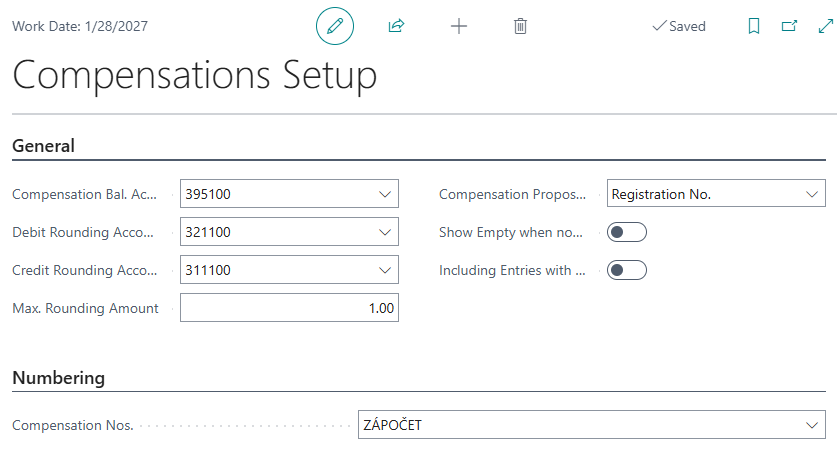
- Compensation Setup – Compensation Nos., Compensation Bal. Account No., and so on
- Compensation Card – Lines for compensation
- Function - Suggest lines for compensation, Release
- Agreement on Mutual Settlement of Receivables and Payables printout
- Compensation posting – Posted compensation is created, and applications for entries are posted.
Compensation setup
To use the compensation features, you must set the basic parameters that relate to the compensation balancing account number to post the credits to. If needed, you can also set the maximum rounding amount for the compensation, and specify the debit rounding account and credit rounding account to use.

Create Compensation
To create compensation, follow these steps:
- Choose the
 icon, enter Compensations, and choose the related link.
 - On Compensations page, choose New.
- On the General FastTab, fill in the Description, Company Type (customer/vendor/contact), Company name, and Posting Date fields.
- Compensation lines can be set manually or by using the Propose compensation lines action. To learn more, go to About the Propose compensation lines action.
About the Propose compensation lines action

- Select the Propose compensation lines action to open the Compensations Proposal tab.
- In this section, you select the customer document and the vendor document you want to use for compensation. To make a selection, choose Customer Ledger Entries to get the option to select or clear the checkbox for specific invoices. The same is true on the vendor side.
- Choose the Recalculate Balance action. The Total Balance (LCY) field is current.
- To add options to the rows, select OK.
Manual row settings
On the Compensations tab, go to the compensation rows and fill in the Source Type and Source Entry No. fields.
Correction amounts on the Lines
You can manually edit the Amount field, or use the Apply Document Balance action to adjust the values so that the total sum of Amount fields is zero. The action doesn't include rows that are marked as Manual Change Only.
Release and posting
Choose the Release action to release the compensation, use the Print action to print the compensation, and the Send action to send the compensation to the other side for signature. You can only post the compensation using the Post action after the other side received the signed the compensation.
After posting, you can go to the Posted compensation tab and print a mutual agreement to perform the compensation.
Check the posted compensation
To check the posted compensation, follow these steps:
- Open the Posted Compensation page.
- Choose the Find Entries link to access a list of related entries. To check which accounts the compensation posted to, select G/L Entry.